|
Drawing a design can be quite difficult but using shading techniques to make the design more realistic adds to the problems a designer has to overcome. Natural woods have a colour and a grain - this can be applied to a design/drawing relatively easily. Below are four stages that may help you use shade to make a design look as if it is made of a natural wood. |
|
| YouTube Video - Shading a Natural Wood Texture | |
 |
|
|
PDF FILE - CLICK HERE FOR PRINTABLE EXERCISE BASED ON WORK SEEN BELOW |
|
|
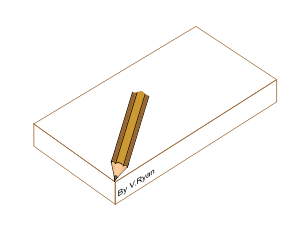
1. Draw the object faintly using an ordinary pencil (for example, a 2H pencil). |
|
|
2. Use a light brown coloured pencil to go round the outline of the drawing |
|
|
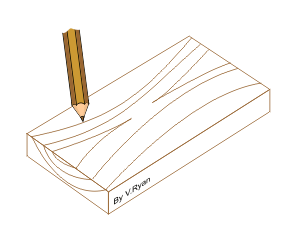
3. Draw on the grain of the wood with the same coloured pencil. A very simple grain such as shown in the example opposite is all that is needed. Remember, wood has end grain - do not miss this out. |
|
|
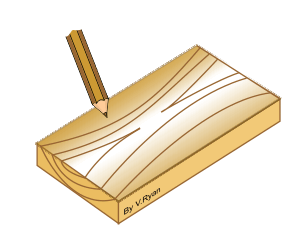
4. Finally, add shade using the same light brown coloured pencil. Often it is a good idea to shade inwards from the sides and leave an area in the centre without shade. This gives the effect of light reflecting from the surface of the wood. |
|
| 1. Copy the stages shown
above, adding shade and grain 2. Draw a simple wood object or a wood joint using the techniques shown above. |
|
|
|
|