| |
| CLICK HERE FOR INDEX PAGE |
| |
| ESTIMATED PERSPECTIVE - 2 |
| V. Ryan © 2006 |
| |
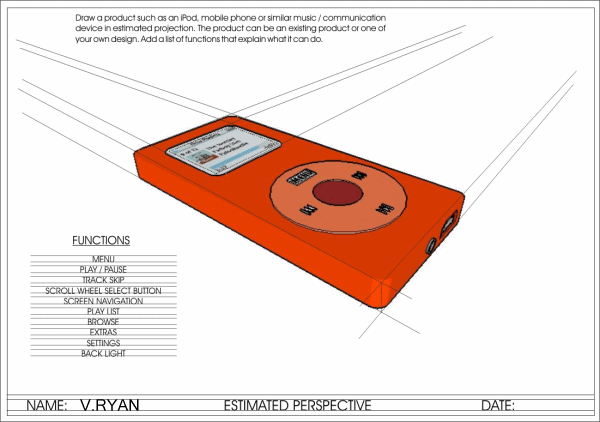
| Below is another example of an everyday product
drawn in two point perspective, estimated perspective. The vanishing
points are outside the margins of the page. |
| |
 |
| |
| The stages involved in drawing the iPOD styled device is outlined below. |
| |
| |
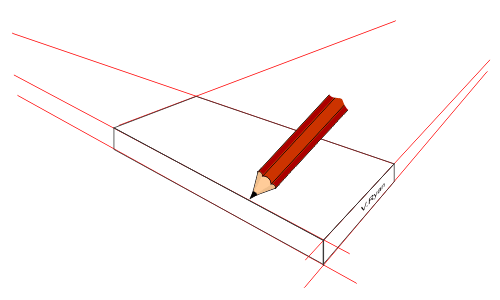
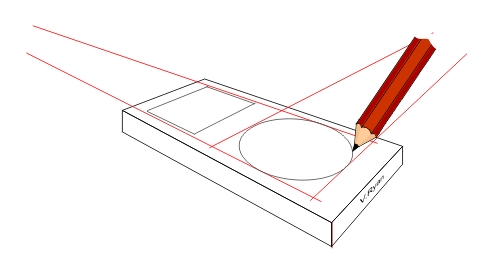
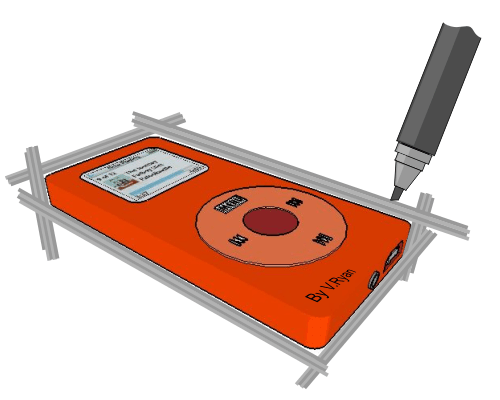
1. Draw a basic cuboid in which the iPod design will
fit. Ensure that the lines are faint and in pencil.
The vanishing points will be off the margins of the page. each time a
guideline is projected you will need to estimate the position of the
invisible vanishing point |
| |
 |
| |
|
|
| |
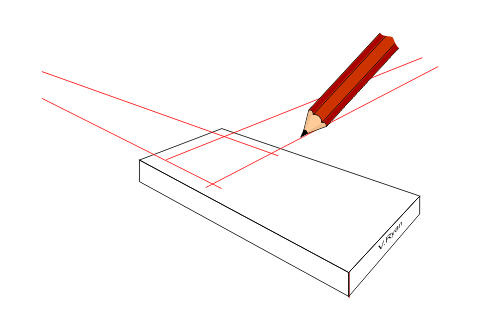
| 2. Draw the position of the menu window by projecting
guidelines to each estimated vanishing point. |
| |
 |
| |
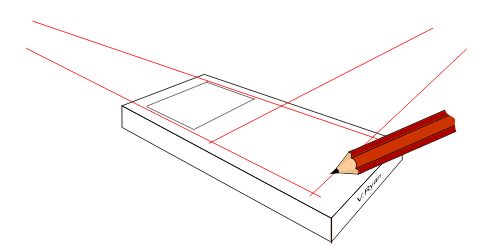
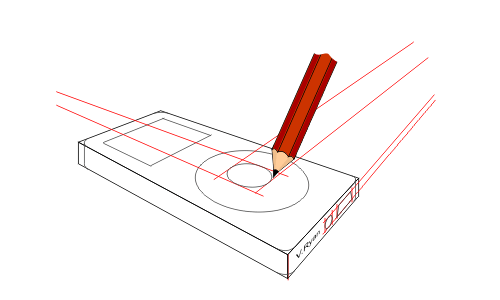
| 3. Draw the position of the scroll wheel -
represented as a rectangle in drawn in perspective. The rectangle sets
the limit to the size of the circle to be drawn next. |
| |
 |
| |
| 4. Carefully sketch the circle. It will be more
elliptical / oval in shape. Sketch faintly as it will probably take
several attempts to draw a shape that looks realistic. |
| |
 |
| |
|
|
| |
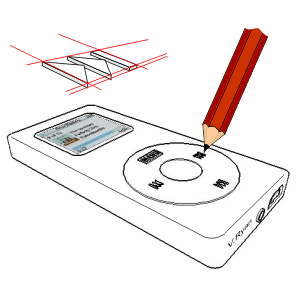
| 5. Draw detail to the scroll wheel using the same
techniques as used for the first perspective circle. |
| |
 |
| |
6. Add detail such as the skip / forward symbols, USB
connector and jack plug etc.... These will be in perspective as well.
Add detail to the menu screen as well. |
| |
 |
| |
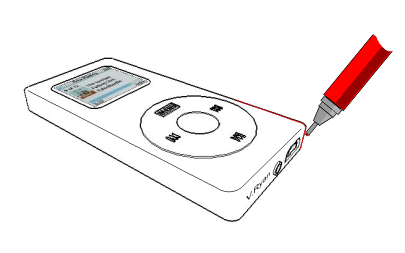
| 7. Use a fine ink pen / felt pen to draw around the
outline of the iPod design |
| |
 |
| |
|
|
| |
| 8. Use a broad ink pen (brush of chisel point) to
colour the complete drawing. allow time for the ink to dry. |
| |
 |
| |
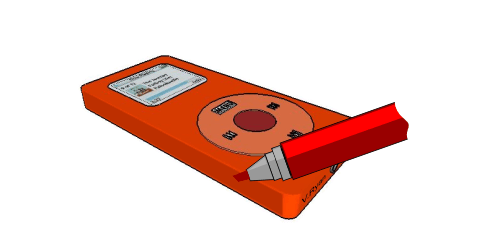
9. Use the same broad / brush ink pen to add another
layer of colour to the side. This will enhance the iPod’s 3D effect.
You may wish to shade another side to further increase the 3D look to
the iPod. |
| |
 |
| |
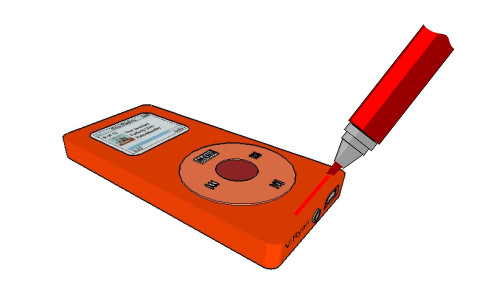
| 10. Use another brush / broad ink or felt pen to
carefully draw around the iPod. This will act as a colourful border -
this will further enhance the drawing. Choose your colour carefully.
Often less bold colours such as yellow, grey or light blue are suitable
for this type of felt pen work. |
| |
 |
| |
| CLICK HERE FOR GRAPHICS INDEX PAGE |
| |
| |
| |
| |