| |
| CLICK HERE FOR INDEX PAGE |
| |
| THE MARKING GAUGE |
| V. Ryan © 2003 - 2023 |
| |
| PDF FILE - CLICK HERE FOR PRINTABLE WORKSHEET |
| |
| CLICK HERE FOR POWERPOINT VERSION OF WORKSHEET |
| |
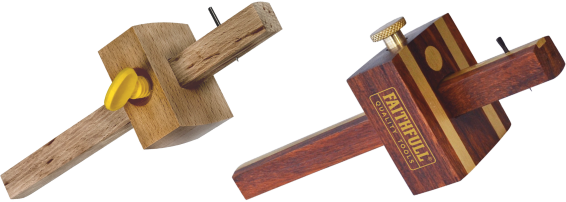
| A marking gauge is used to mark a line parallel to a
straight edge. The stem and stock are made from beech and the thumbscrew
from clear yellow plastic. The better quality gauges have brass inserts
at the front of the stock. These help reduce the wear on the stock as it
is pushed against the surface of the wood - to be marked. The marking
gauge is an extremely important tool for marking parallel lines and
preparing for cutting joints. |
| |
| TWO TYPICAL MARKING GAUGES |
| |
 |
| |
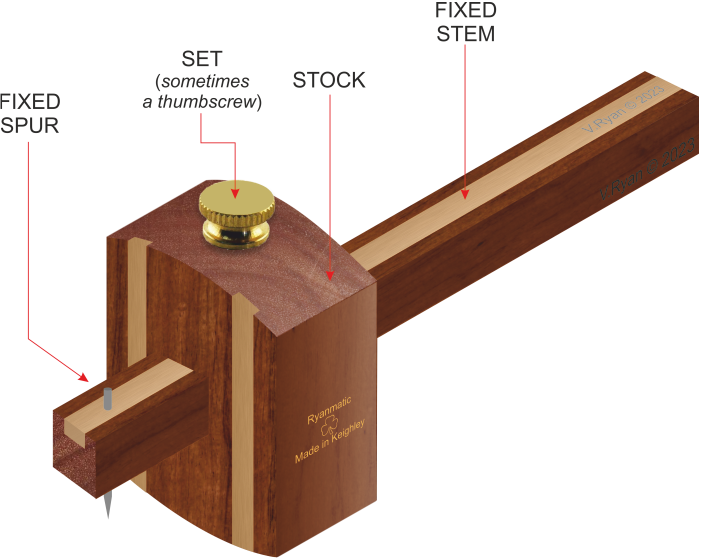
| LARGE MORE DETAIL IMAGE OF A QUALITY MARKING GAUGE |
| |
 |
| |
|
|
| |
 |
| |
| |
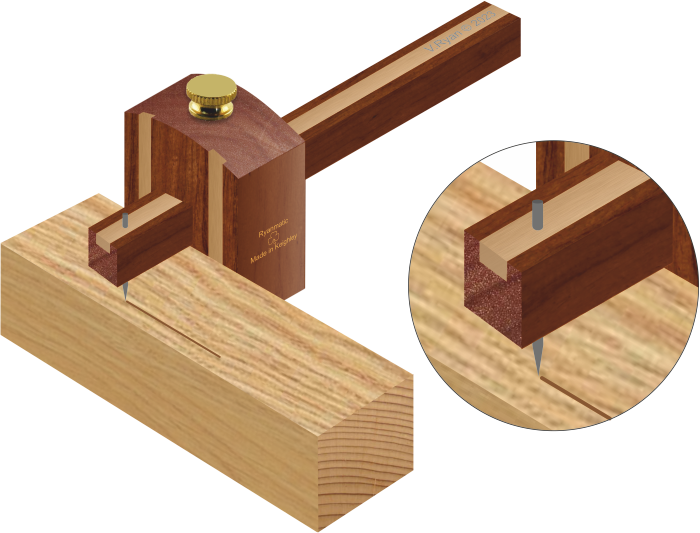
The gauge has a sharp point called a spur. This is made from hardened steel and
is the part that ‘scribes’ the line into the surface of the wood. The
distance between the stock and the spur can be adjusted by loosening the
thumbscrew which allows the stock to slide along the stem. The
thumbscrew can then be tightened once the correct distance has been
reached. A ruler is used to set the distance (see diagram opposite).
If the spur is replaced with a small knife it is now called a cutting gauge and is used for cutting lines
into solid wood surfaces in preparation for veneering or inlaying. |
|
 |
| |
|
ALTERING THE DISTANCE
BETWEEN THE SPUR AND STOCK |
| |
|
|
| |
MARKING WITH THE GAUGE
The wood is held firmly to the bench by a G cramp or
bench hook. The stock of the marking gauge is pressed firmly against a
straight edge of the wood and pushed carefully along it. A little
pressure is applied to the spur, too much pressure and the spur digs
into the wood marking an ugly line on the surface.
It is a good idea to lightly scribe a line along the surface first and
then repeat the process two or three times until an accurate scribed
line can be seen. |
| |
 |
| |
 |
| |
|
|
| |
QUESTIONS
1. Practice
using a marking gauge until you have mastered the process.
2. Draw a marking gauge and label each part. |
| |
| CLICK HERE FOR EQUIPMENT AND ACCESSORIES INDEX |
| |
| |
| |
| |
| |