CLICK HERE FOR INDEX PAGE

VACUUM FORMING

V. Ryan © 2001-2022


Vacuum Forming - Box Learning Exercise (Independent Learning Exercise)
 

Vacuum forming is a technique that is used to shape a variety of plastics. In school it is used to form/shape thin plastic, usually plastics such as; polythene and perspex. Vacuum forming is used when an unusual shape like a ‘dish’ or a box-like shape is needed. Below you can see the stages involved in vacuum forming.


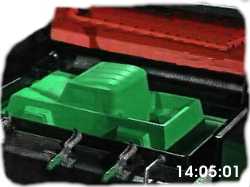
To the right is an example of a vacuum formed toy. The simple 'lorry' mould has been placed in a vacuum former and a compressed polystyrene sheet has been placed above it. The polystyrene has been heated and then vacuum formed to the shape of the mould.

Many everyday items have been vacuum formed in this way. Look around your home - list some examples. as a guide - some food products are packaged in vacuum formed materials.


IMPORTANT - CLICK HERE FOR AN EXAMPLE OF VACUUM FORMING (ANIMATION)


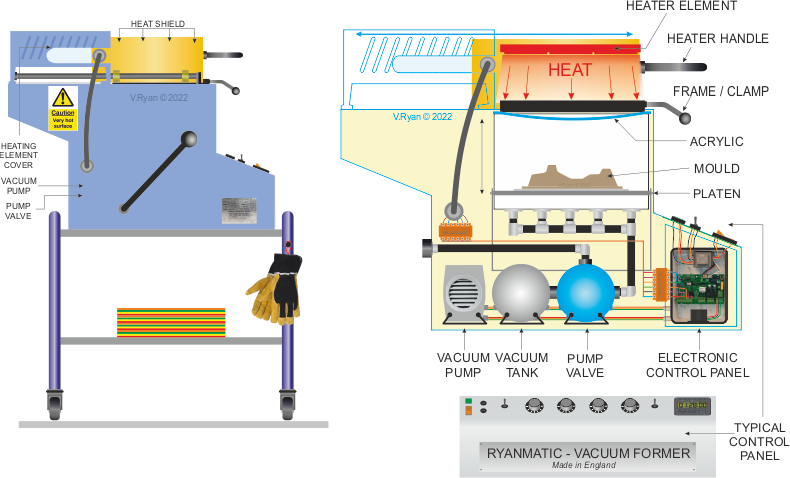
THE STAGES INVOLVED IN VACUUM FORMING


Below are the stages involved in the vacuum forming of a small 'plastic' dish or bowl


1. First, a former is made from a material such as a soft wood. The edges or sides are shaped at an angle so that when the plastic is formed over it, the former can be removed easily.

2. The former is placed in a vacuum former.

3. A sheet of plastic (for example, compressed polystyrene) is clamped in position above the mould.

4. The heater is then turned on and the plastic slowly becomes soft and pliable as it heats up. The plastic can be seen to 'warp' and 'distort' as the surface expands.


5. After a few minutes the plastic is ready for ‘forming’ as it becomes very flexible.

6. The heater is turned off and the mould is moved upwards by lifting the lever until it locks in position.

7. The 'vacuum' is turned on and this pumps out all the air beneath the plastic sheet. Atmospheric pressure above the plastic sheet pushes it down on the mould. At this stage the shape of the mould can be clearly seen through the plastic sheet. When the plastic has cooled sufficiently the vacuum pump is switched off.

8. The plastic sheet is removed from the vacuum former. The sheet has the shape of the former pressed into its surface.


9. The excess plastic is trimmed so that only the plastic bowl remains - the completed item. An enlarged view of the final dish is seen opposite.


The final completed dish is the result of vacuum forming. Without a material such as polystyrene or a similar type of plastic, it would be very difficult to manufacture a dish like this.
Vacuum forming allows us to make unusual shapes with ease. You may find it is a good technique for your projects.


1. Describe how vacuum forming is used to produce usual shapes. Draw and explain each stage.
2. Name the plastics that can be used for this technique.


CLICK HERE FOR NEXT VACUUM FORMING PAGE AND EXERCISE


CLICK HERE FOR EQUIPMENT AND ACCESSORIES INDEX


Google
 
Web www.technologystudent.com