|
ADHESIVES FOR WOODS |
||
|
V. Ryan © 2001 - 2022 |
||
|
When you manufacture a product using woods it will soon
be necessary to join parts together. This can be done using fixings such as
screws, nails and pins OR through the use of glues. Modern glues are very
strong and if adverts on TV are to be believed, joints made with glues can
be stronger than the wood itself. |
||
|
SEQUENCE DRAWING - APPLYING PVA ADHESIVE |
||
|
Produce a sequence drawing which clearly shows the stages involved in using PVA to join two pieces of pine. An animation is shown below (click here for example sequence drawing) |
||
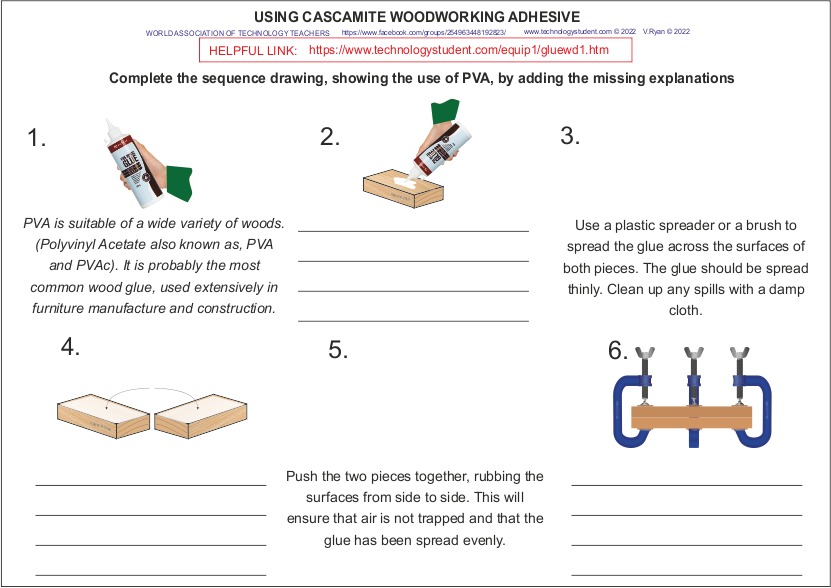
| 1. Select an appropriate glue for the materials to be joined. PVA is suitable of a wide variety of woods. (Polyvinyl Acetate also known as, PVA and PVAc). It is probably the most common wood glue, used extensively in furniture manufacture and construction. It is a synthetic resin and an very good glue. | ||
 |
||
| 2. Squeeze PVA glue onto the surface of both pieces of wood. If glue spills onto surfaces that do not require gluing, remove it immediately with a damp cloth. | ||
 |
||
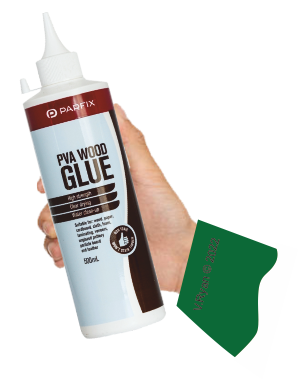
| 3. Use a plastic spreader or a brush to spread the glue across the surfaces of both pieces. The glue should be spread thinly. Clean up any spills with a damp cloth. | ||
 |
||
| 4. The surfaces of both pieces to be glued should be ‘coated’ in glue, but not excessively. | ||
 |
||
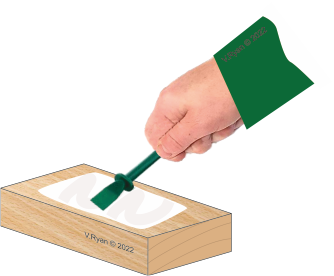
| 5. Push the two pieces together, rubbing the surfaces from side to side. This will ensure that air is not trapped and that the glue has been spread evenly. | ||
 |
||
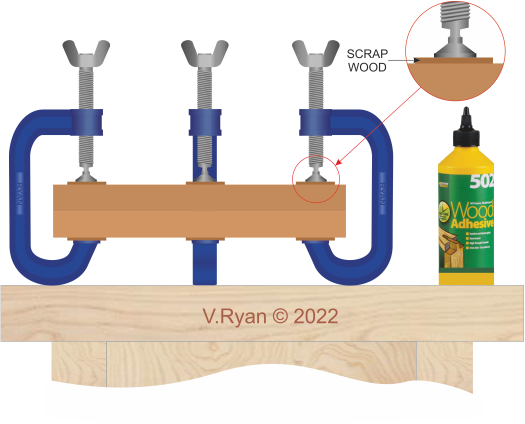
| 6. Use cramps such as G Cramps to lock the two pieces together. Leave for twenty four hours before removing the cramps. | ||
| The G-cramps shown below, have been set up to clamp two pieces of wood together. Small pieces of scrap wood are used to protect the surfaces of the wood being glued together. | ||
 |
||
|
PDF FILE - CLICK HERE FOR PRINTABLE VERSION OF EXERCISE SHOWN BELOW |
||
| CLICK HERE FOR POWERPOINT VERSION OF WORKSHEET | ||
|
|
||
|
1. Describe / explain a traditional adhesive. |
||