| CLICK HERE FOR INDEX PAGE |
| |
| INVERTED ROUTER TABLE |
V.Ryan © 2022-2023 |
| |
| PDF FILE - CLICK HERE FOR PRINTABLE WORKSHEET |
| |
| CLICK HERE FOR POWERPOINT VERSION OF WORKSHEET |
| |
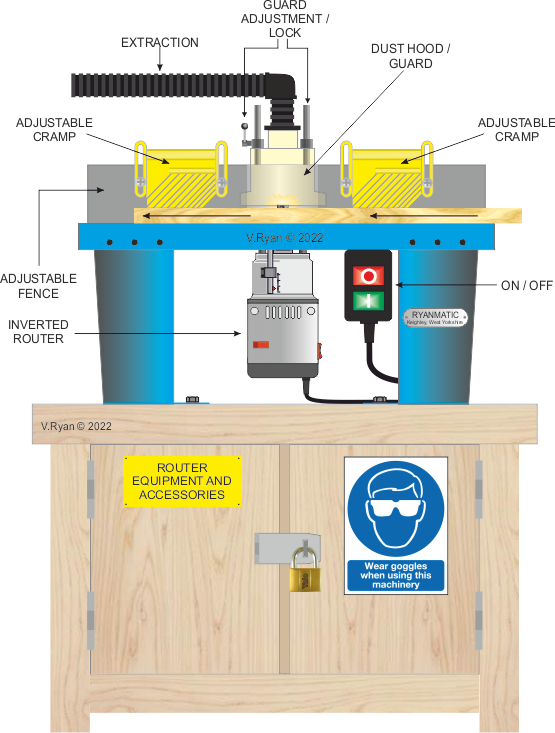
| Home-made router tables are illegal. Only use a manufactured table that complies with Health and Safety legislation. An example of a manufactured router table is shown below. Good quality router tables, tend to be manufactured from cast steel of ‘thick’ sheet metal. |
| |
 |
| |
|
|
| |
| FRONT VIEW |
| |
 |
| |
| PLAN VIEW |
| |
 |
| |
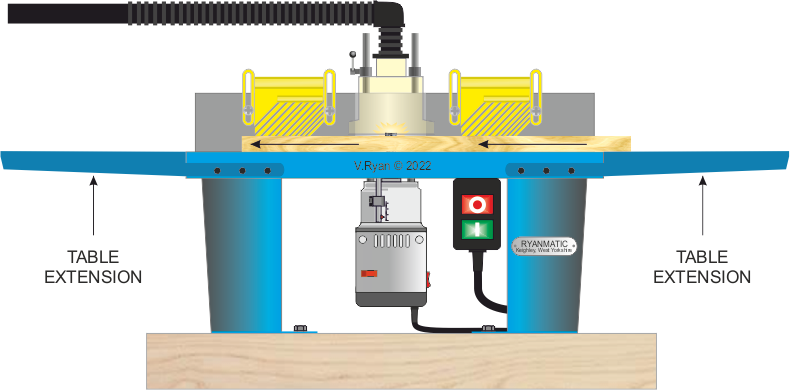
| ROUTER TABLE WITH EXTENSIONS |
| |
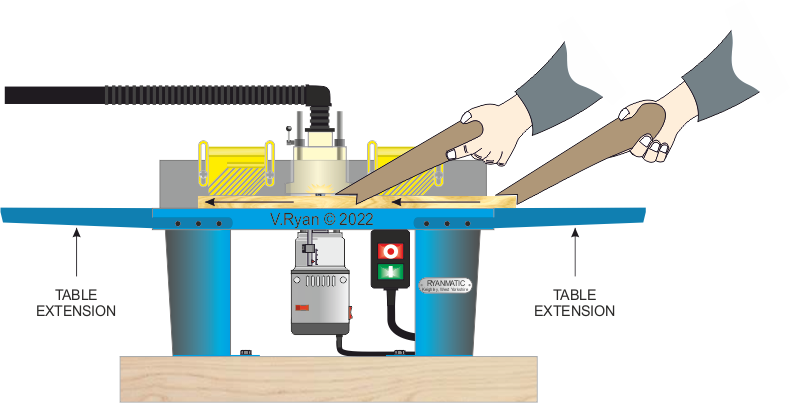
| The table extensions are sometimes bolted on, to allow better control over longer pieces of wood being routed. The pieces being machined, rest on the extensions, reducing the possibility of them falling off the end of the ‘machine table’. |
| |
 |
| |
|
|
| |
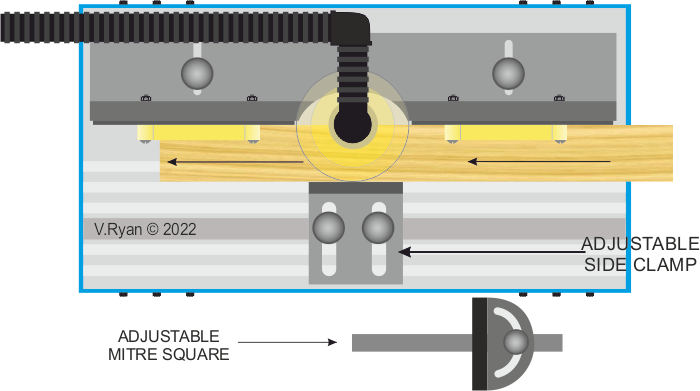
| In certain circumstances, push sticks are used to guide the work through the cutter. This ensures that the operators hands are not close to cutters and rotating parts. These applies particularly, when routing smaller pieces. |
| |
 |
| |
| SAFETY AND THE INVERTER ROUTER TABLE |
| |
Router tables are supplied in various sizes and forms, from different manufacturers. Therefore, it is important to read instruction manuals and to attend a safety course, before using your inverted router / router table. Ensure the router table / set up satisfies all legal requirements. The stand it sits on, should be supplied with the router. It must is not be homemade. The router table and its stand, should be bolted to a substantial work bench / cabinet, specifically designed for this machine.
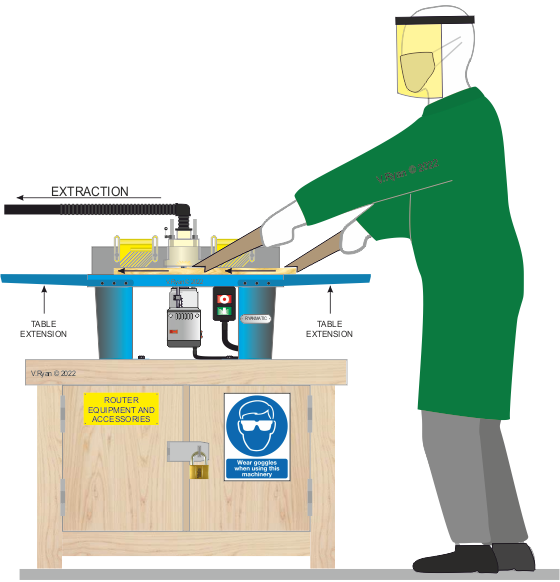
Wear the correct safety ‘gear’, including goggles / visor, a work coat / apron. Ear defenders may also be required.
Ensure that the fences and ‘clamps / cramps are securely in place.
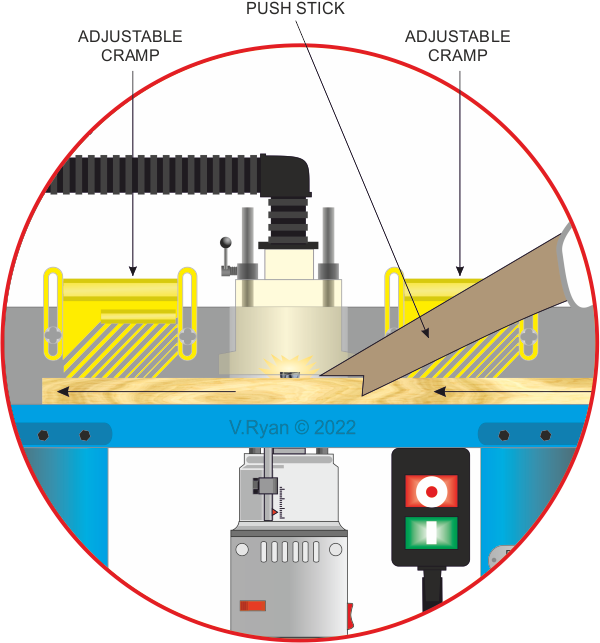
Keep hands and fingers well away from the cutter / rotating parts. If necessary, use push sticks, as shown in the diagram below.
Use extraction and wear a dust mask, as routing creates lots of dust. |
| |
Do not attempt to router small pieces of wood, as these are extremely dangerous to handle. Start with a piece larger than you need. It is wise to cut down the wood to the required size, after all routing is complete.
When using the router, make multiple light cuts, rather than attempting a deep cut in one go. Never try to force the wood through the router. This usually means that the cut is being attempted is too deep. Stop work, turn off the power and reduce the depth of cut.
Turn the power off, when changing a cutter or making any adjustments. |
| |
 |
| |
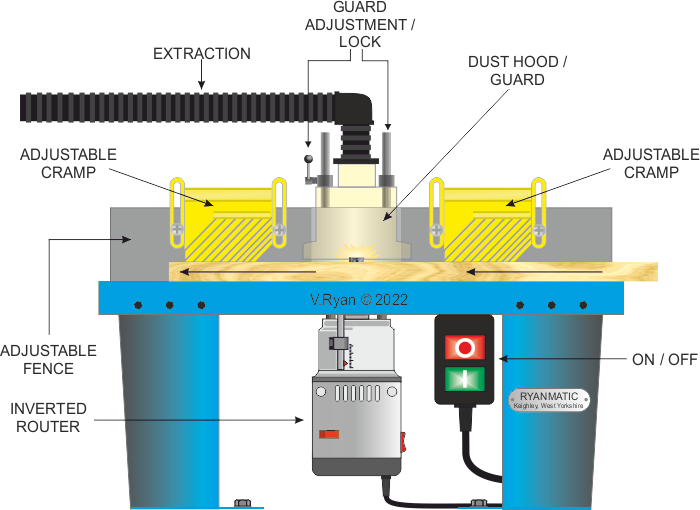
| The diagram below, shows the router cutter in action. The extraction is directly above the ‘dust / chippings’ area, although this varies between makes of router table. Notice the push stick is near the rotating cutter. Putting a hand in this position, would be reckless and dangerous. The use of a push stick eliminates this danger. The guard can be raised or lowered, depending on the thickness of the material being routed (the adjustment lever is clearly seen). The Cramps on either side of the cutter can also be seen. They have been positioned to prevent the wood from lifting up. |
| |
 |
| |
|
|
| |
| DIY QUALITY - INVERTED ROUTER TABLE |
| |
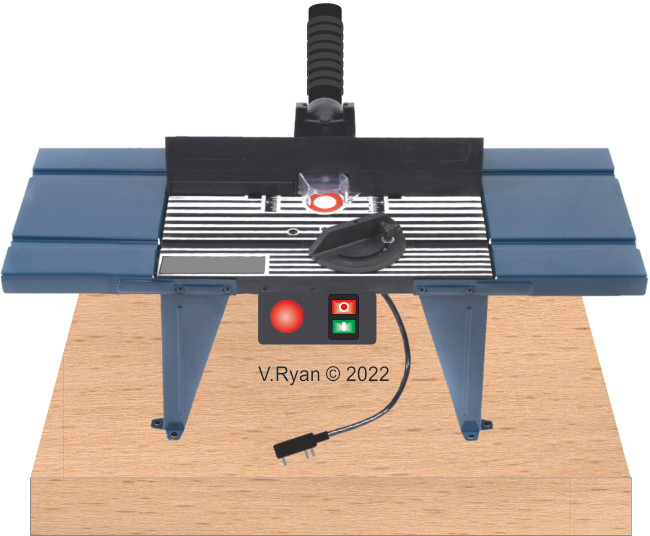
| A cheaper router table, for a DIY enthusiast, is seen below. It is designed so that a typical hand held machine router can be turned upside down and bolted to the underneath. These tend to be lightweight and the operator must bolt the router table to a bench, ensuring stability. They are usually supplied with an extraction tube, which will connect to a workshop extractor. |
| |
 |
| |
| |
| CLICK HERE FOR EQUIPMENT AND PROCESSES INDEX PAGE |
| |
|
| |
|