| |
| CLICK HERE FOR INDEX PAGE |
| |
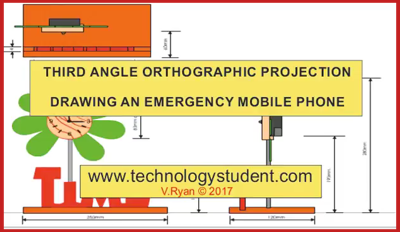
STAGES OF DRAWING A MOBILE PHONE
IN THIRD ANGLE ORTHOGRAPHIC
PROJECTION |
| V. Ryan © 2007-2017 |
| |
| YouTube Video - Drawing an Emergency Mobile Phone |
 |
| |
|
|
| |
| The stage of drawing a simple mobile phone in Third
Angle Orthographic Projection are outlined below. |
| |
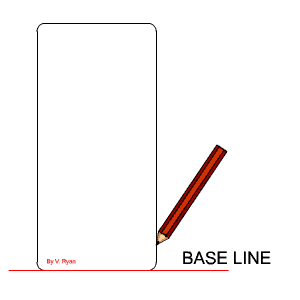
1. Draw a faint horizontal base line. The front and
side view will be drawn resting on this line. It ensures that these two
views are in line and level.
HINT - Draw very faintly using a 2H pencil.
Draw the outline of the front view. |
 |
| |
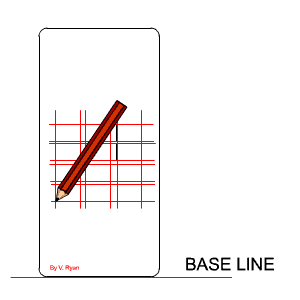
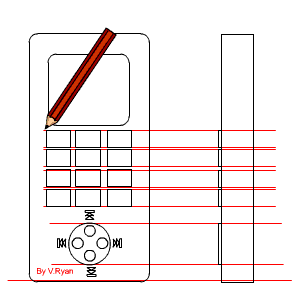
2. Draw a grid very faintly. This will be for the
buttons / keys. The lines must be drawn precisely - horizontal and
vertical lines must be accurate.
Once the grid is drawn add the buttons. |
 |
| |
|
|
| |
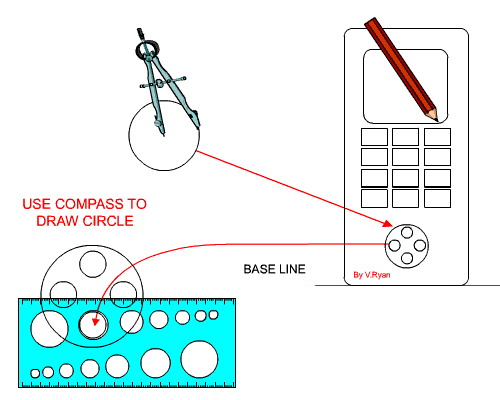
3. Draw the rectangular liquid crystal display and the
circular control.
Draw the large circle using a compass. Smaller circles are best drawn
using a circle template. |
| |
 |
| |
| 4. Draw the left / right / up / down keys. These are
quite small but they must be drawn precisely. |
 |
| |
| 5. Draw the side view being careful to line up the
buttons so that the buttons on the side view are level with those on the
front view. |
 |
| |
|
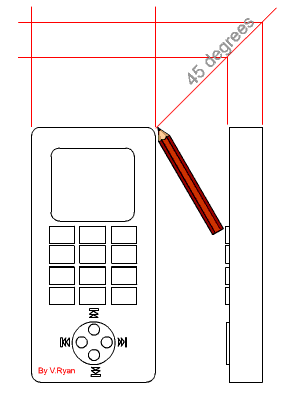
| 6. Draw a 45 degree line from the top right corner of
the front view. Project the thickness of the mobile phone up to the angled
line and across the form the outline of the plan view. |
 |
| |
|
|
| |
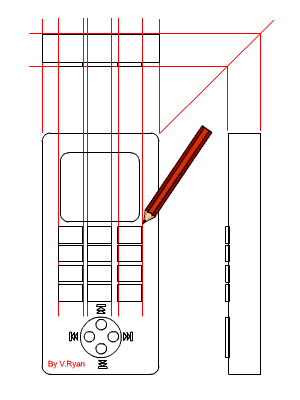
| 7. Add the detail to the plan view (the keys). These
can be seen from above as they stick out of the surface. |
 |
| |
|
| CLICK HERE FOR GRAPHICS INDEX
PAGE |
| |