| CLICK HERE FOR INDEX PAGE |
| |
| MARKING OUT AND CUTTING A CROSS HALVING JOINT |
V.Ryan © 2022 |
| |
| PDF FILE - CLICK HERE FOR INSTRUCTION SHEET / POSTER - MARKING OUT AND CUTTING CROSS HALVING JOINTS |
| |
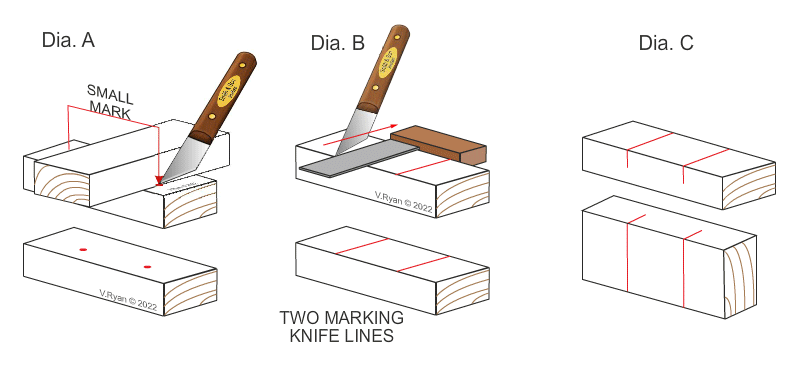
Position the two pieces as shown below in Dia. A, making sure that they line up centrally. Create two small marks with a marking knife, which gives the thickness of the top piece of wood (Dia. A).
Place a try square against the edge of the wood and ‘draw’ a line across, using the marking knife, as shown in Dia B. This will need to be done twice.
Continuing to use the try square and marking knife, draw the line half way down each of the sides - Dia C. Repeat the same procedure on the second piece of wood. |
| |
 |
| |
|
|
| |
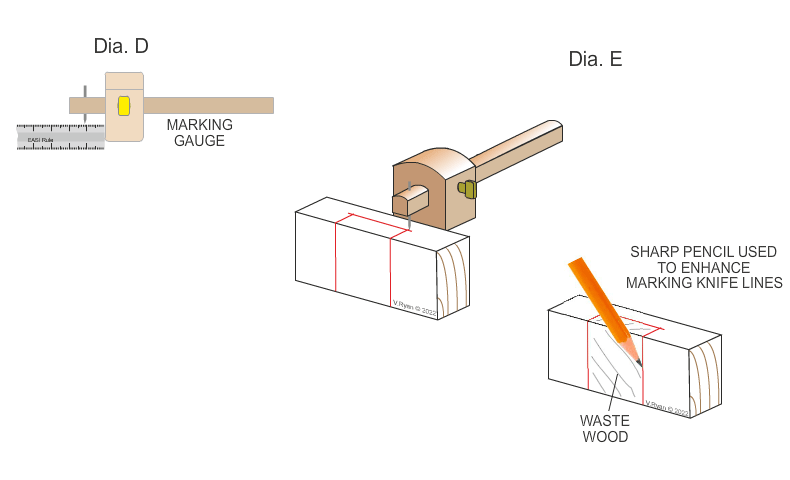
| Set a marking gauge to half the width of the wood (Dia. D). Use the gauge to mark the lines, along each side (Dia. E), clearly showing the waste wood. At this stage it may be wise to use a sharp pencil, to enhance the marking knife lines. Also, shade the waste wood, so that it is clearly seen. Repeat the same procedure on the second piece of wood. |
| |
 |
| |
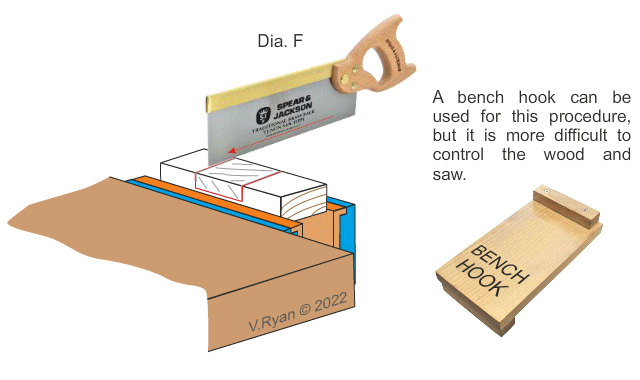
| Secure the wood in a vice. Saw down each side of the joint, cutting on the waste wood side of the lines (Dia. F). Repeat the same procedure on the second piece of wood. |
| |
 |
| |
|
|
| |
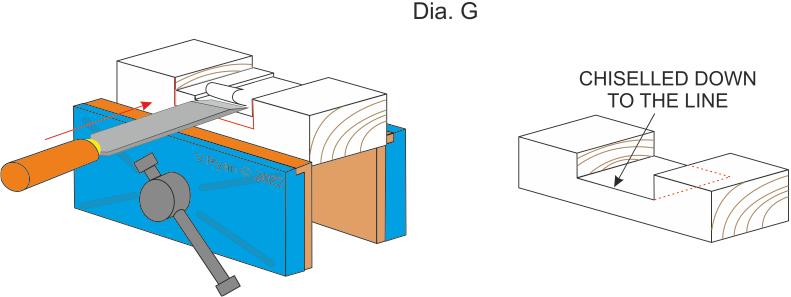
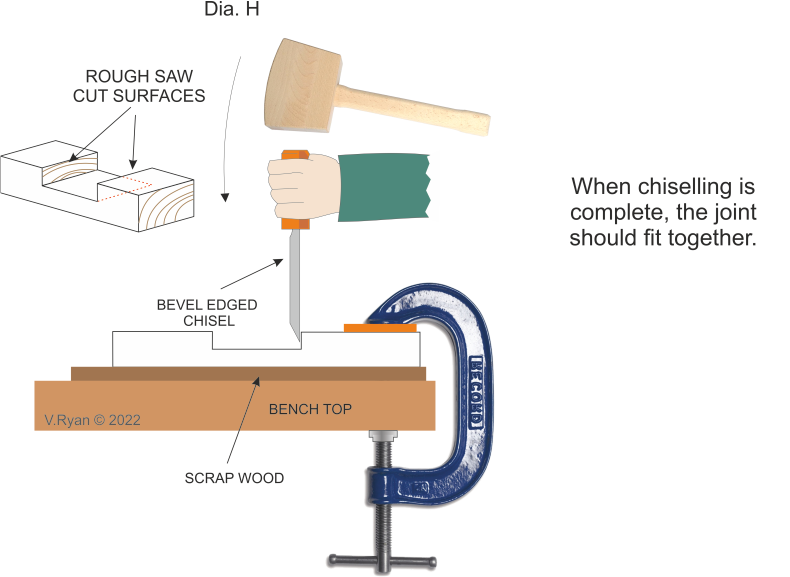
Secure the wood in the vice. Use a bevel edged chisel to slowly remove the waste material.
Repeat the same procedure on the second piece of wood. |
| |
 |
| |
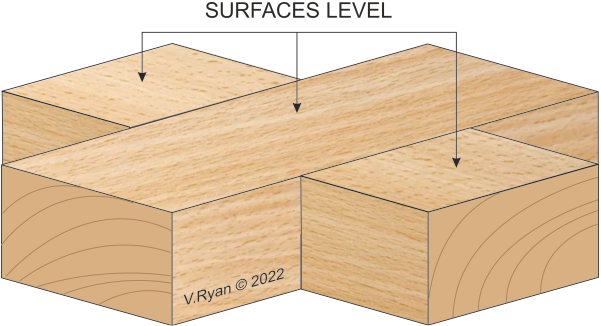
| At this stage the sides of the joint will be rough, due to the action of the saw blade. The chisel’s sharp edge should be lodged in marking out line on the top surface. Carefully ‘tap’ the chisel with a mallet, removing the final waste wood. This will ensure the sides are accurately cut (Dia. H). Repeat the same procedure on the second piece of wood. |
| |
 |
| |
|
|
| |
 |
| |
| |
| CLICK HERE FOR RESISTANT MATERIALS INDEX PAGE |
| |
|
| |
|