| CLICK HERE FOR INDEX PAGE |
| |
| THROUGH HOUSING JOINT - INCLUDING MARKING OUT AND CUTTING |
V.Ryan © 2022 |
| |
| PDF FILE - POSTER - HOW TO MARK OUT AND CUT A THROUGH HOUSING JOINT |
| |
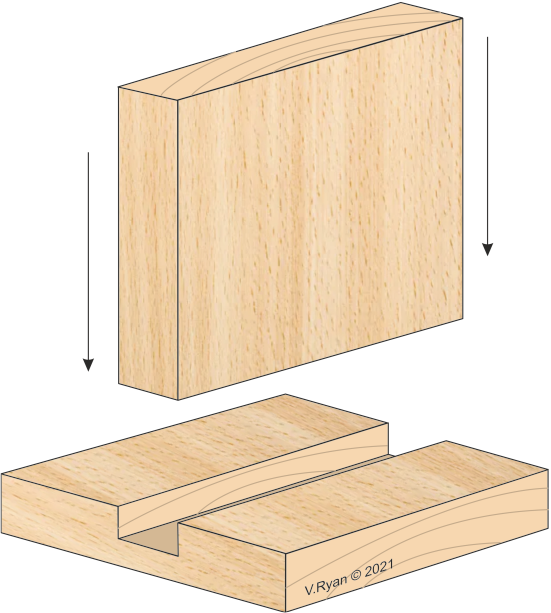
A ‘Through Housing’ joint is composed of a grooved piece, into which a board / second piece fits (see opposite). It is a relatively simple and effective glued joint. It is the most straightforward of a number of housing joints. |
| |
| EXPLODED VIEW |
| |
 |
| |
|
|
| |
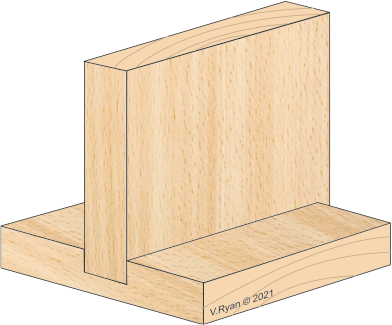
| ASSEMBLED VIEW |
| |
 |
| |
| PVA or Cascamite glue, is normally applied to the joint before assembly, resulting in a permanent joint. |
| |
 |
| |
| MARKING OUT AND CUTTING A THROUGH HOUSING JOINT |
| |
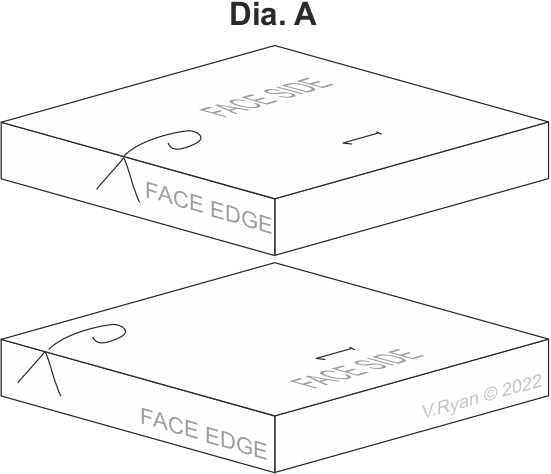
| Mark the ‘face side’ and ‘face edge’ on both pieces of wood. These are the edges you will work from, when marking out the joint. Mark ‘1' on each piece, as shown below. |
| |
 |
| |
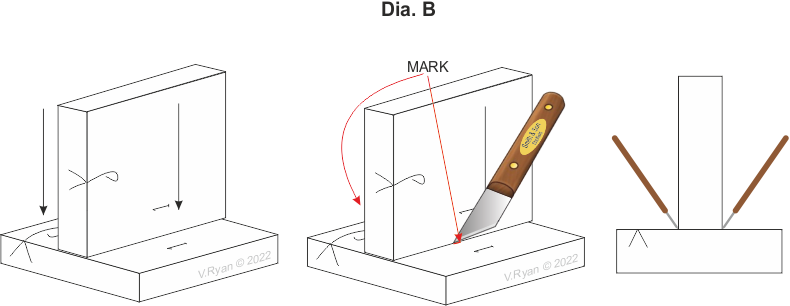
| Align the two pieces. Ensure that the numbers are next to each other and the ‘face edges’ line up. |
| |
| Use a marking knife to ‘mark’ the thickness of the top on the bottom piece. |
| |
 |
| |
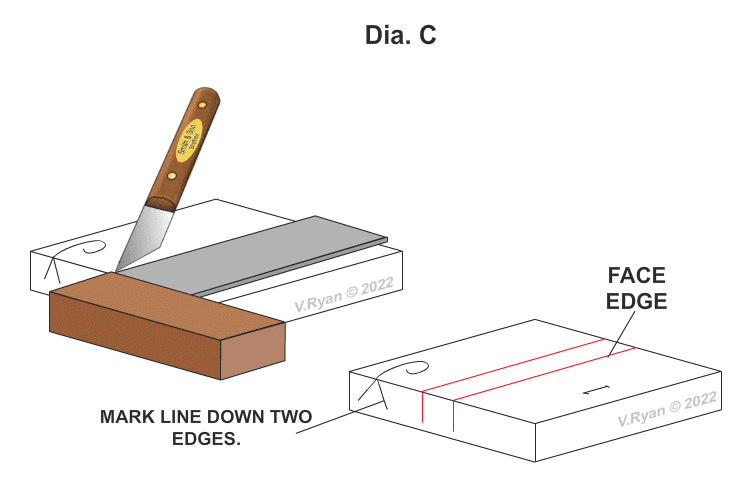
| On the bottom piece only - use a try square and marking knife to mark two lines across the face side and down the two edges. Place the stock of the try square against the ‘face edge’. |
| |
 |
| |
|
|
| |
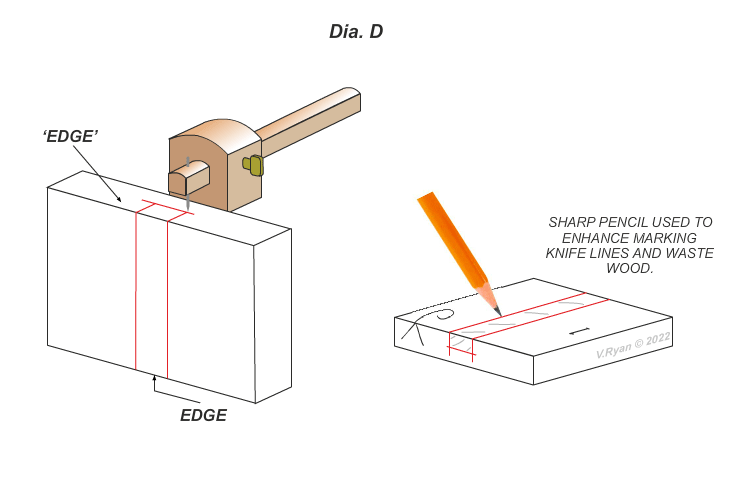
| Use a marking gauge, to mark the depth of the joint, on each edge, clearly showing the waste wood. |
| |
 |
| |
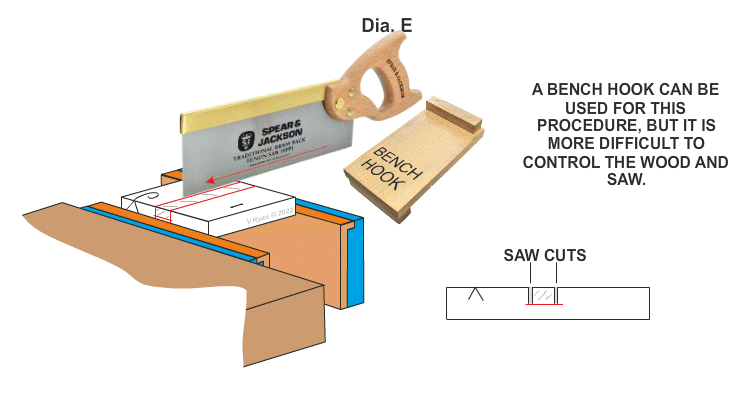
| Secure the wood in a vice. Saw down, cutting on the waste wood side of the lines. |
| |
 |
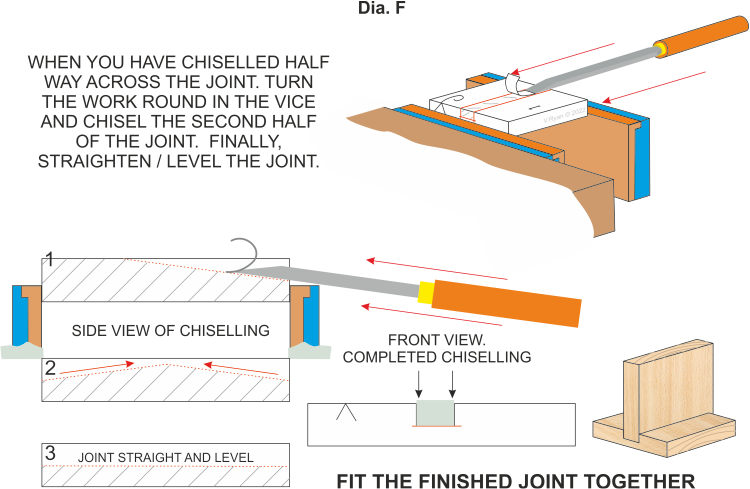
Slowly remove the waste wood with a chisel (bevel edged preferred), working upwards and towards the centre (see dia 1, 2 & 3 below).
Do not chisel all the way across, as this can split the wood, at the far side. |
| |
 |
| |
| ALTERNATIVELY, A ROUTER PLANE CAN BE USED TO REMOVE THE WASTE WOOD |
| |
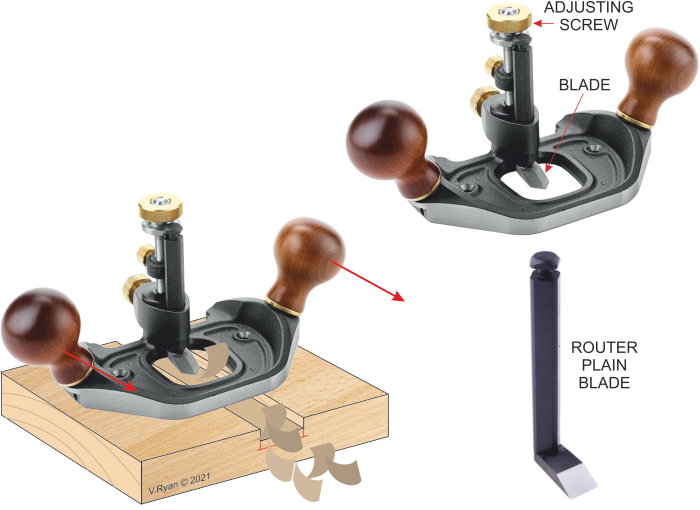
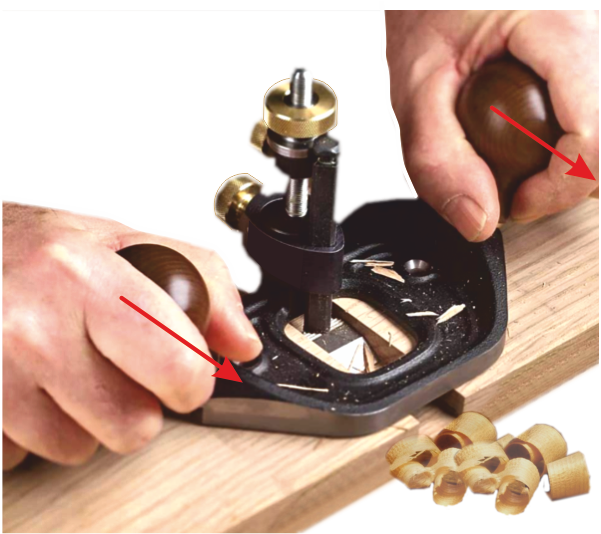
Metal Router Planes are supplied with a range of plane blades. The width of the blade is selected according to the width of the waste wood to be removed. They are ideal when cutting grooves, such as those required by a housing joint.
The depth of cut is adjusted by turning the adjusting screw. |
| |
 |
| |
|
|
| |
| The router plane blade is adjusted, so that it planes a thin layer of wood, each time the plane is pushed forward. Planing with this equipment should be slow and steady, until the correct depth is reached. Short, repetitive forward pushes of the plane, are needed to cut an accurate groove. |
| |
 |
| |
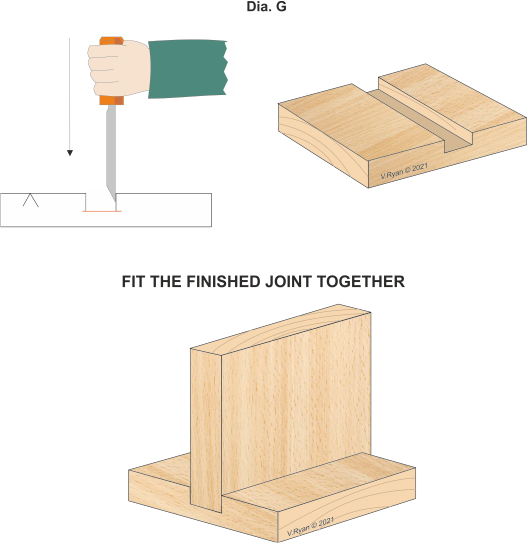
The sides of the groove / joint, are finished by placing the cutting point of a broad bevel edged chisel, in the ‘marking out’ knife line created by the marking knife (dia.c).
A blow to a chisel from a mallet, repeated as many times as required, straightens the sides. |
| |
 |
| |
| |
| CLICK HERE FOR RESISTANT MATERIALS INDEX PAGE |
| |
|
| |
|