Without a purpose built jig, constructing the bridge is very difficult as the triangular shapes may differ in size.
| CLICK HERE FOR INDEX PAGE | ||
| MODEL ART STRAW BRIDGE PROJECT - PAGE 2 | ||
| V. Ryan © 2004 - 2009 | ||
|
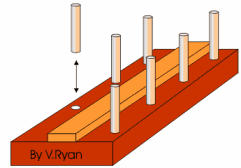
The first stage of making the art straw bridge is to
a make a wooden jig. This is comprised of a base and a number of dowel
rods. The jig is used to bend/form the straws accurately. The dowel rods
can be removed and placed back in position, making it easier to
construct the bridge. Without a purpose built jig, constructing the bridge is very difficult as the triangular shapes may differ in size. |
|
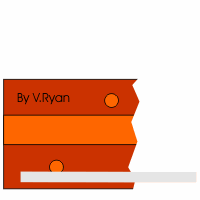
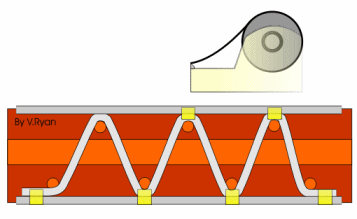
| Take a full length art straw and fold it round each of the dowel rods until one side of the bridge is produced. This can be done quite easily by adding the dowel rods one at a time, as the straw is folded to the correct shape | ||
| FOLD 1 | FOLD 2 | |
|
|
|
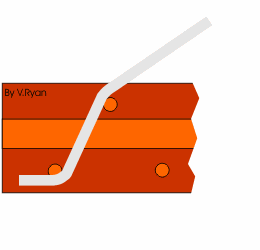
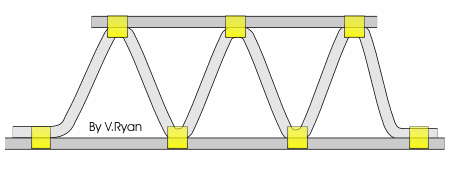
| The overall shape can be seen below: | ||
|
||
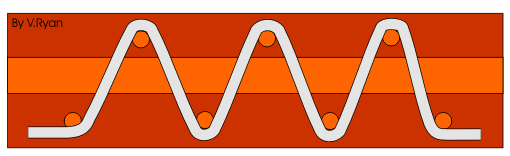
| Using sellotape, attach two straws, one above and another below each of the sides as seen in the diagram. This will hold of the sides together. | ||
|
||
|
Use scissors to cut the straws to the correct size. | |
| A finished side is seen below. Two sides are needed to construct the bridge. | ||
|
||
| CLICK HERE FOR NEXT MODEL BRIDGE PAGE | ||
| CLICK HERE FOR STRUCTURES INDEX PAGE | ||