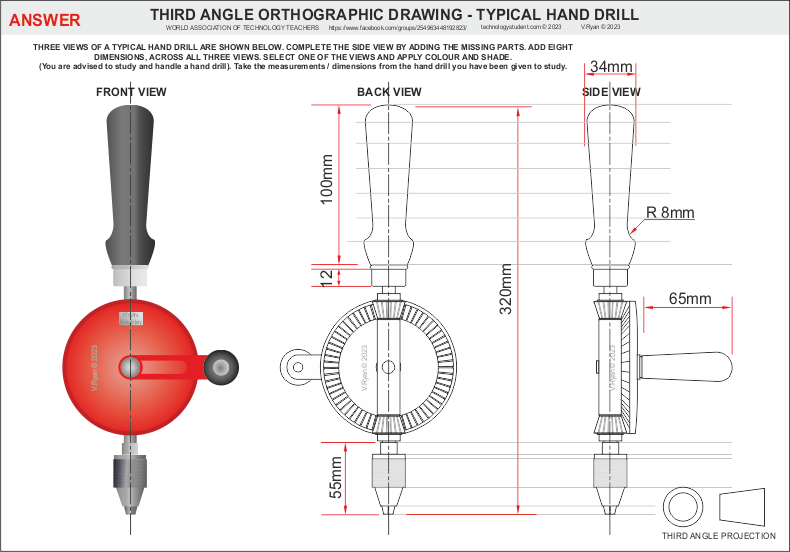
CLICK HERE FOR INDEX PAGE
 
ORTHOGRAPHIC DRAWING - ADVANCED EXERCISE THREE

V.Ryan © 2023

 
ORTHOGRAPHIC DRAWING - COMPLERTE THE DRAWING OF THE HAND DRILL
 
Below are two sets of orthographic drawing of a typical hand drill. The first is a colour rendered, labelled version. The second set is a typical orthographic drawing, which includes a back view, front view and side view. There is no need for a plan view because the three existing views provide all the information about the drill, including main measurements / dimensions.
 
COLOUR RENDERED ORTHOGRAPHIC DRAWING


ORTHOGRAPHIC DRAWING
 
 
HINTS AND TIPS
 

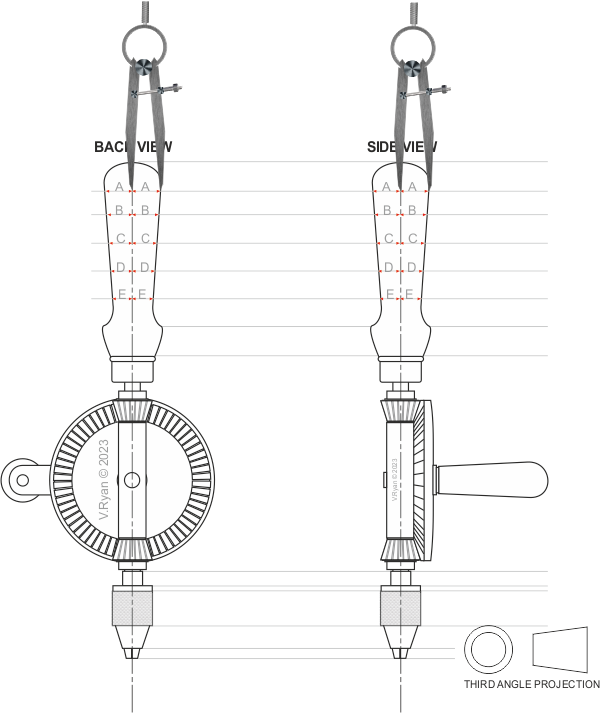
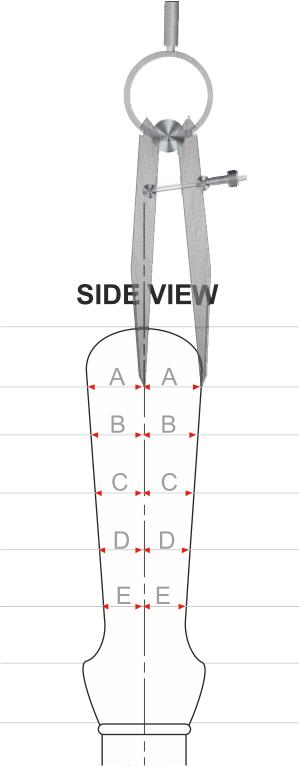
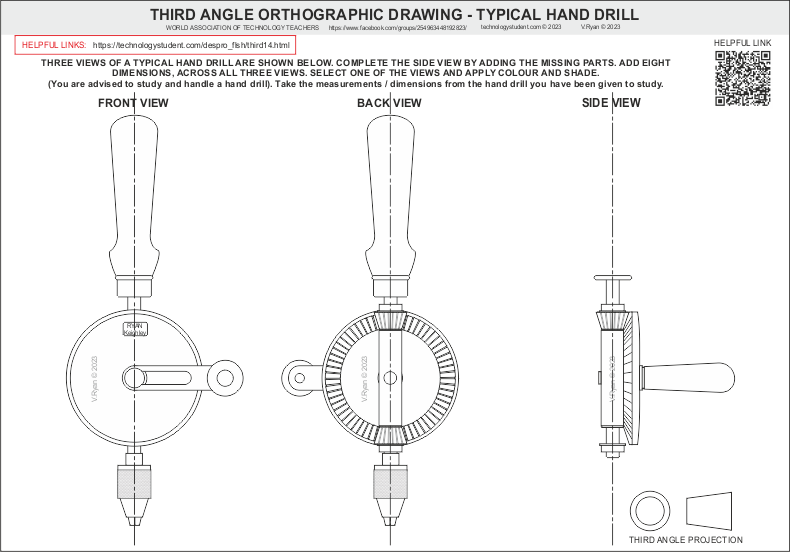
Draw a centre line down the ‘centre’ of each view.

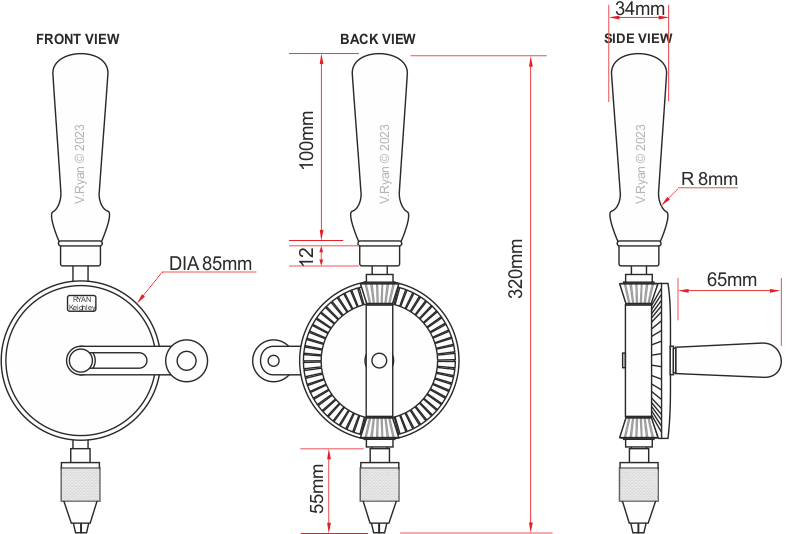
Project guidelines across, from the back view to the side view, so that the handle and chuck are in line. You may need several guidelines when copying the size of the handle, across to the side view.

Another good idea is to use a pair of dividers. Take each individual measurement for the handle (seen below as A, B, C, D, E), with the dividers, from the back view and transfer the measurements to the side view.

The same technique can be used to draw the chuck on the side view.
For small curves use a circle template.


QUESTION
 
 
PDF FILE - CLICK HERE FOR PRINTABLE WORKSHEET
 
CLICK HERE FOR POWERPOINT VERSION OF WORKSHEET
 
THE ANSWER


CLICK HERE FOR GRAPHICS INDEX PAGE
 
Google
 
Web www.technologystudent.com